
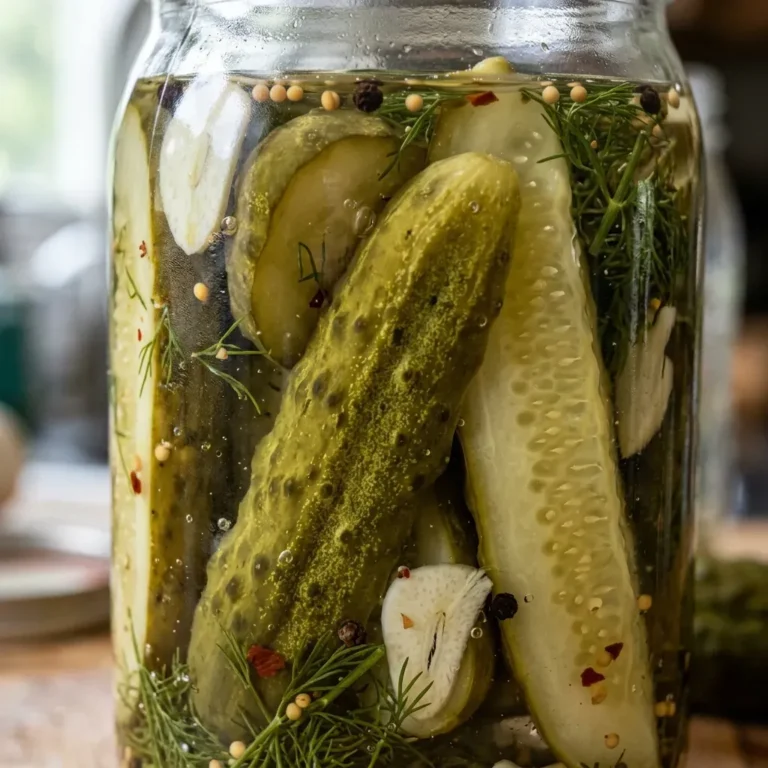
There’s something truly magical about a homemade treat, especially one that brings a bright burst of flavor to any meal. For years, my kids would turn their noses up at store-bought pickles, but then I discovered the secret to making perfect refrigerator dill pickles. I remember the first time I made these simple refrigerator dill pickles; my youngest, usually a picky eater, grabbed one straight from the jar!
Watching her crunch happily on those crisp dill pickles filled my heart. These aren’t your grandma’s long canning process pickles; these are easy refrigerator dill pickles, ready in just a few days, packed with amazing flavor. They’ve become a staple in our home, a testament to how simple, fresh ingredients can create something truly extraordinary.
If you’re looking for a quick, no-fuss way to enjoy crisp, tangy homemade dill pickles, these refrigerator dill pickles are absolutely for you. I promise, once you try these incredible refrigerator dill pickles, you’ll never go back to store-bought.
WHY YOU’LL LOVE THESE REFRIGERATOR DILL PICKLES
You will absolutely adore these refrigerator dill pickles for so many reasons. First, they are incredibly easy; no canning experience is necessary for these quick dill pickles. Simply prepare and refrigerate!
Furthermore, these homemade dill pickles offer an unmatched fresh flavor. The bright tanginess and herby dill truly shine in these fridge pickles. They are also super versatile, perfect as a snack or alongside almost any dish.
Plus, these delicious dill pickles provide a healthy, low-calorie, and satisfying crunch. Enjoy the simple pleasure of making your own crisp refrigerator dill pickles at home.
INGREDIENTS YOU’LL NEED
Making outstanding refrigerator dill pickles requires just a few basic items. Gather these for your next batch of perfect homemade dill pickles.
| Ingredient | Quantity |
|---|---|
| Kirby cucumbers | 2 pounds (about 6-8 medium) |
| Water | 2 cups |
| White vinegar | 2 cups |
| Non-iodized salt (kosher or pickling) | 2 tablespoons |
| Granulated sugar | 1 tablespoon |
| Fresh dill sprigs | 6-8 sprigs |
| Garlic cloves | 4-6, peeled and smashed |
| Black peppercorns | 1 teaspoon |
| Optional: Red pepper flakes | 1/2 teaspoon, for a kick |
SUBSTITUTIONS & VARIATIONS
Feel free to customize your refrigerator dill pickles! For different cucumbers, try Persian cucumbers or English cucumbers, though Kirby cucumbers offer the best crunch for dill pickles. Adjust the spice level by adding more red pepper flakes for spicy refrigerator dill pickles.
You can also experiment with different herbs like mustard seeds, coriander seeds, or even bay leaves to create unique fridge pickles. For a slightly sweeter pickle, increase the sugar amount in your homemade dill pickle brine. Feel confident in making these quick dill pickles your own!
STEP-BY-STEP INSTRUCTIONS
Making these refrigerator dill pickles is wonderfully straightforward. Follow these steps for crisp, flavorful homemade dill pickles.
- Wash cucumbers thoroughly. Slice them into spears or rounds, depending on your preference for these easy dill pickles.
- In a large non-reactive pot, combine water, vinegar, salt, and sugar. Bring the mixture to a rolling boil, stirring until salt and sugar dissolve. This is your brine for the refrigerator dill pickles. Remove from heat and let cool slightly.
- Meanwhile, divide the fresh dill, smashed garlic, and peppercorns among clean quart-sized jars. Add optional red pepper flakes to some jars for spicy dill pickles.
- Pack the cucumber slices tightly into the jars, leaving about a half-inch headspace. This ensures even brining for your refrigerator dill pickles.
- Carefully pour the cooled brine over the cucumbers in each jar, ensuring all cucumbers are submerged. You want every part of these refrigerator dill pickles to soak up the flavor.
- Tap the jars gently to release any air bubbles. Seal the jars with lids.
- Refrigerate the refrigerator dill pickles for at least 24-48 hours before enjoying. The flavors deepen significantly over time, making these homemade dill pickles even better.
PRO TIPS FOR SUCCESS
Achieve the absolute best refrigerator dill pickles with these simple tips. Always use fresh, firm cucumbers; they make the crispest dill pickles. Trim the blossom end of the cucumber to prevent mushiness in your refrigerator dill pickles.
Ensure your brine cools slightly before pouring; this helps maintain cucumber crispness. Pack the jars tightly, but don’t smash the cucumbers, for perfect fridge pickles. For optimal flavor, give your homemade dill pickles at least two days in the fridge. These tips ensure your refrigerator dill pickles are always a hit!
STORAGE & REHEATING TIPS
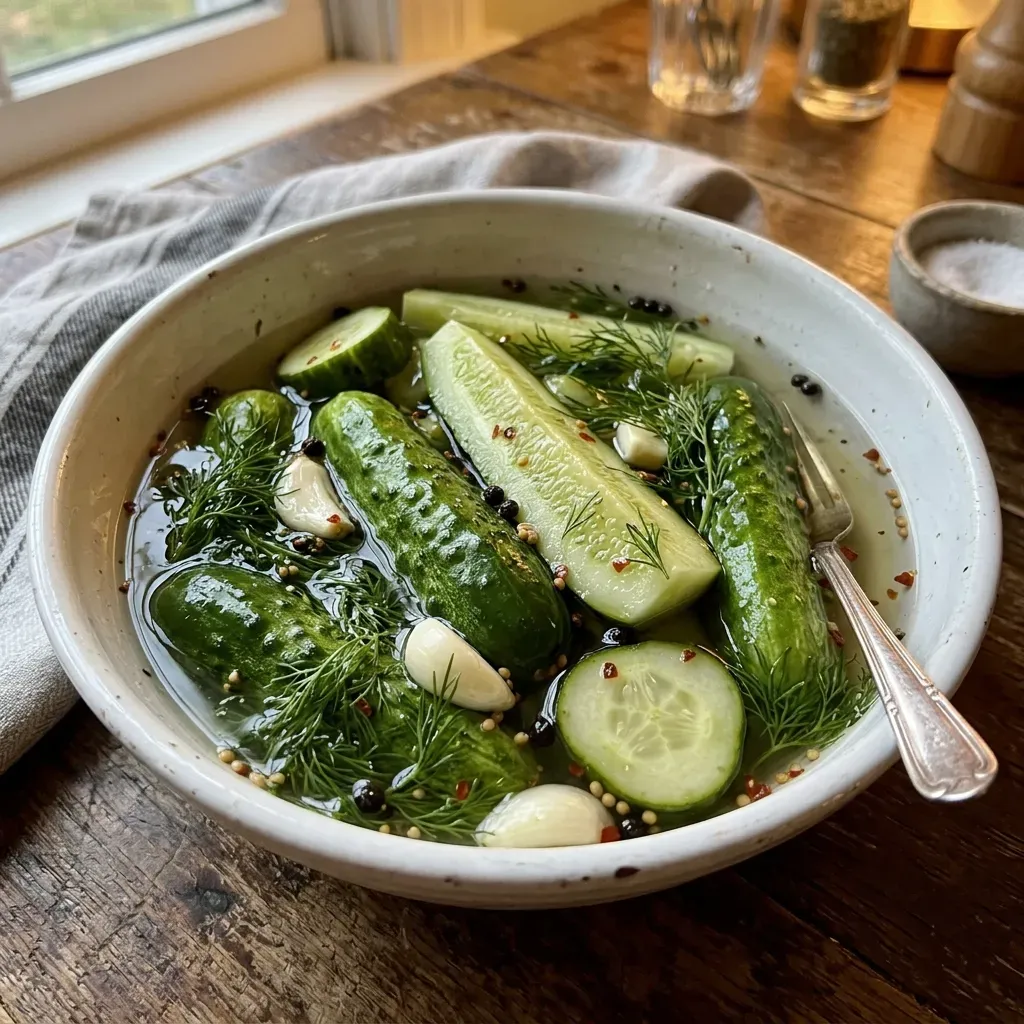
These refrigerator dill pickles are designed for the fridge! Store your sealed jars of homemade dill pickles in the refrigerator. They remain crisp and flavorful for up to 3-4 weeks.
Always ensure the cucumbers stay submerged in the brine to prevent spoilage. There is no reheating necessary for these quick dill pickles; serve them chilled straight from the jar for the best experience. Proper storage is key to enjoying your delicious refrigerator dill pickles for weeks.
WHAT TO SERVE WITH THIS RECIPE
These versatile refrigerator dill pickles complement so many meals. Serve them alongside a juicy burger or hot dogs for a classic pairing. They are fantastic with grilled cheese sandwiches, adding a tangy contrast.
Include these homemade dill pickles on a charcuterie board for a bright, crunchy element. Chop them up for potato salad or tuna salad, instantly elevating the flavors. Of course, they also make a perfect stand-alone snack! You will find countless ways to enjoy these amazing refrigerator dill pickles.
FAQS
How long do refrigerator dill pickles last?
Properly stored, your refrigerator dill pickles will last in the refrigerator for about 3-4 weeks. Ensure they remain fully submerged in the brine for optimal freshness.
Can I use other types of cucumbers for refrigerator dill pickles?
Yes, you can! While Kirby cucumbers are ideal for refrigerator dill pickles due to their firmness, Persian or English cucumbers also work. Just be aware they might be slightly less crisp than traditional dill pickles.
What makes refrigerator dill pickles different from canned pickles?
Refrigerator dill pickles are made without a traditional canning process, meaning they are not shelf-stable and must be kept refrigerated. Canned pickles undergo a hot water bath process that seals them, allowing for pantry storage. These quick dill pickles offer a fresher, crisper texture.
NUTRITION INFORMATION (PER SERVING)
These refrigerator dill pickles are a light and flavorful addition to any meal. This information is approximate and can vary based on ingredients and portion sizes of your homemade dill pickles.
| Nutrient | Amount |
|---|---|
| Calories | 5-10 kcal |
| Total Fat | 0 g |
| Sodium | 150-200 mg |
| Total Carbs | 1-2 g |
| Dietary Fiber | 0.5 g |
| Sugars | 0.5 g |
| Protein | 0 g |
Refrigerator Dill Pickles
- Total Time: 25 minutes
- Yield: 2-3 quart jars
- Diet: Low-calorie, Healthy, Vegetarian, Vegan
Description
Discover the magic of homemade refrigerator dill pickles! These incredibly easy and quick dill pickles are packed with fresh, tangy flavor, offering a satisfying crunch without any canning experience required.
Ingredients
Kirby cucumbers: 2 pounds (about 6-8 medium)
Water: 2 cups
White vinegar: 2 cups
Non-iodized salt (kosher or pickling): 2 tablespoons
Granulated sugar: 1 tablespoon
Fresh dill sprigs: 6-8 sprigs
Garlic cloves: 4-6, peeled and smashed
Black peppercorns: 1 teaspoon
Optional: Red pepper flakes: 1/2 teaspoon, for a kick
Instructions
1. 1. Wash cucumbers thoroughly. Slice them into spears or rounds, depending on your preference for these easy dill pickles.
2. 2. In a large non-reactive pot, combine water, vinegar, salt, and sugar. Bring the mixture to a rolling boil, stirring until salt and sugar dissolve. This is your brine for the refrigerator dill pickles. Remove from heat and let cool slightly.
3. 3. Meanwhile, divide the fresh dill, smashed garlic, and peppercorns among clean quart-sized jars. Add optional red pepper flakes to some jars for spicy dill pickles.
4. 4. Pack the cucumber slices tightly into the jars, leaving about a half-inch headspace. This ensures even brining for your refrigerator dill pickles.
5. 5. Carefully pour the cooled brine over the cucumbers in each jar, ensuring all cucumbers are submerged. You want every part of these refrigerator dill pickles to soak up the flavor.
6. 6. Tap the jars gently to release any air bubbles. Seal the jars with lids.
7. 7. Refrigerate the refrigerator dill pickles for at least 24-48 hours before enjoying. The flavors deepen significantly over time, making these homemade dill pickles even better.
Notes
Always use fresh, firm cucumbers; they make the crispest dill pickles. Trim the blossom end of the cucumber to prevent mushiness.
Ensure your brine cools slightly before pouring to maintain cucumber crispness. Pack the jars tightly, but don’t smash the cucumbers. For optimal flavor, give your homemade dill pickles at least two days in the fridge.
Store your sealed jars in the refrigerator for up to 3-4 weeks. Always ensure cucumbers stay submerged in the brine to prevent spoilage. Serve chilled straight from the jar for the best experience; no reheating necessary.
- Prep Time: 20 minutes
- Cook Time: 5 minutes
- Category: Condiment
- Method: Refrigerator Pickling
- Cuisine: American
Nutrition
- Serving Size: 1 pickle spear
- Calories: 5-10 kcal
- Sugar: 0.5 g
- Sodium: 150-200 mg
- Fat: 0 g
- Saturated Fat: 0 g
- Unsaturated Fat: 0 g
- Trans Fat: 0 g
- Carbohydrates: 1-2 g
- Fiber: 0.5 g
- Protein: 0 g
- Cholesterol: 0 mg
Keywords: refrigerator dill pickles, homemade pickles, easy pickles, quick pickles, crisp pickles, tangy pickles, no-canning pickles