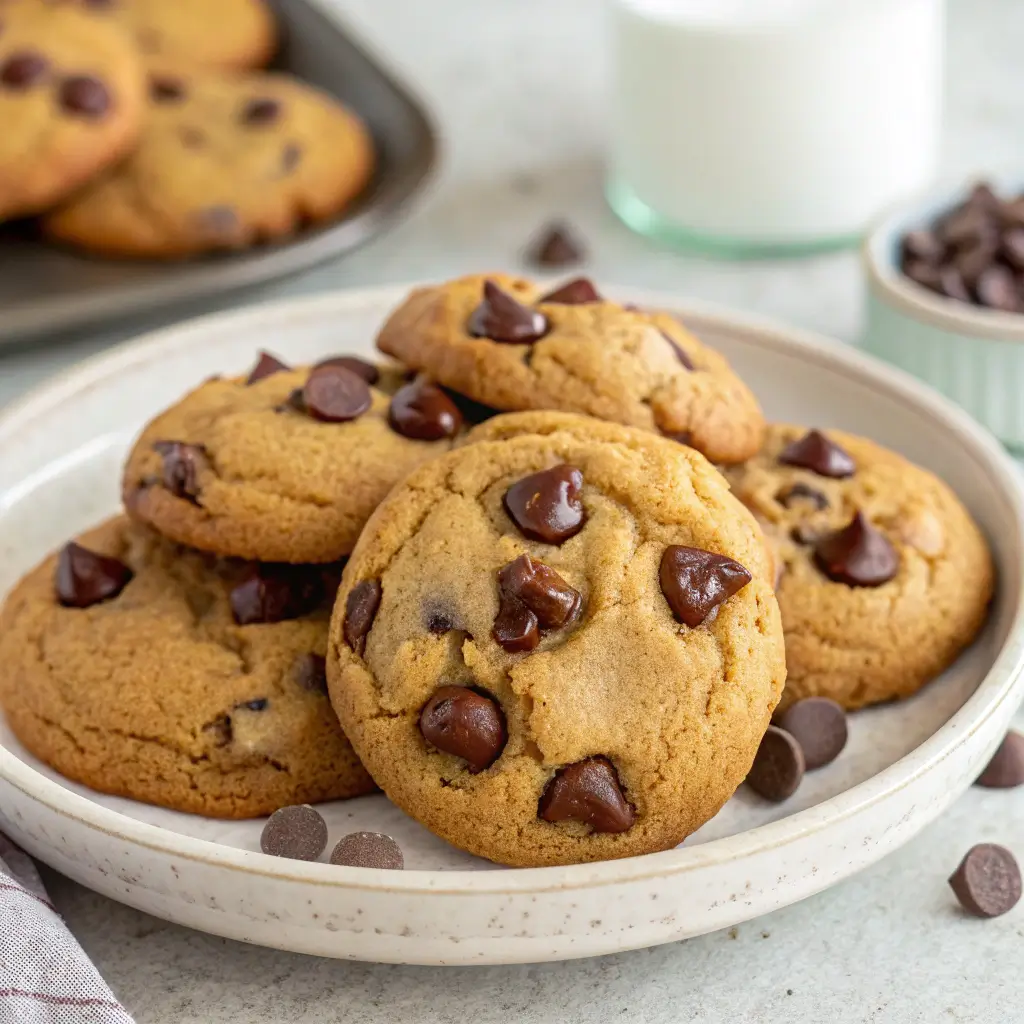
Brown Butter Chocolate Chip Cookies are rich, chewy, and full of nutty flavor. Browning the butter adds a deep caramel-like taste that takes classic chocolate chip cookies to a whole new level. These cookies are easy to make, with a crisp edge, soft center, and plenty of melty chocolate in every bite.
Why Make This Brown Butter Chocolate Chip Cookies Recipe
- Browned butter creates a unique, nutty flavor.
- The cookies are soft in the middle with chewy edges.
- They use simple ingredients you already have at home.
- Perfect for gifting, sharing, or enjoying warm with a glass of milk.

Brown Butter Chocolate Chip Cookies
- Total Time: 32 minutes (plus chilling)
- Yield: 24 cookies 1x
- Diet: Vegetarian
Description
Chewy, nutty, and rich brown butter chocolate chip cookies with crisp edges and gooey chocolate centers a bakery-style classic with elevated flavor.
Ingredients
- 1 cup unsalted butter
- 1 cup brown sugar
- 1/2 cup granulated sugar
- 2 large eggs, room temperature
- 2 teaspoons vanilla extract
- 2 1/4 cups all-purpose flour
- 1 teaspoon baking soda
- 1/2 teaspoon baking powder
- 1/2 teaspoon salt
- 2 cups semi-sweet chocolate chips or chopped chocolate
- Flaky sea salt, for topping
Instructions
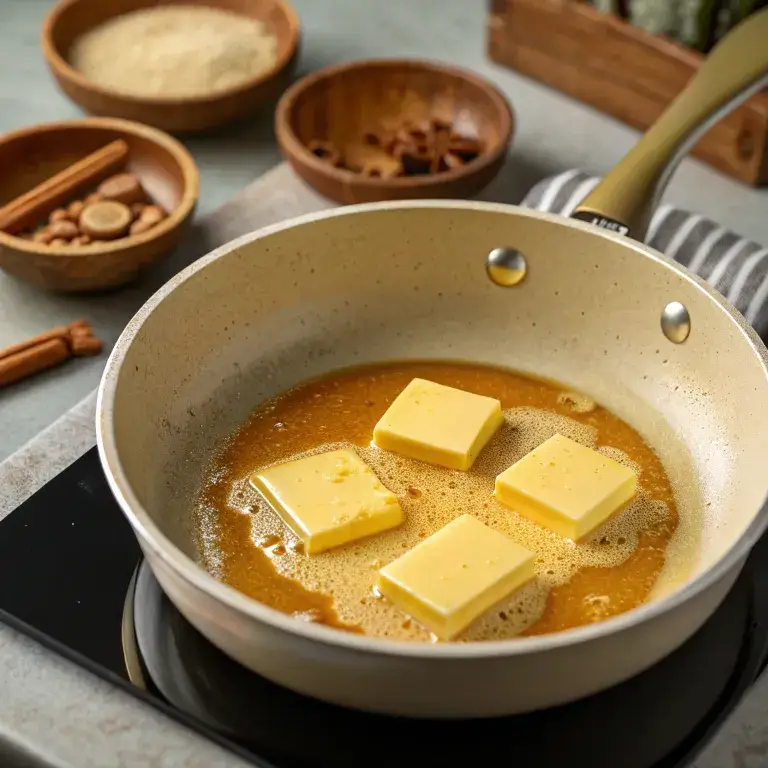
- 1. In a saucepan over medium heat, melt butter and cook until golden brown and nutty in aroma, about 5–7 minutes. Remove from heat and let cool slightly.
- 2. In a large mixing bowl, whisk together brown sugar, granulated sugar, and browned butter until combined.
- 3. Beat in eggs one at a time, followed by the vanilla extract.
- 4. In a separate bowl, whisk together flour, baking soda, baking powder, and salt.
- 5. Gradually add dry ingredients to the wet mixture and mix until just combined.
- 6. Fold in chocolate chips.
- 7. Chill dough for at least 30 minutes (up to overnight) for best flavor and texture.
- 8. Preheat oven to 350°F (175°C). Line baking sheets with parchment paper.
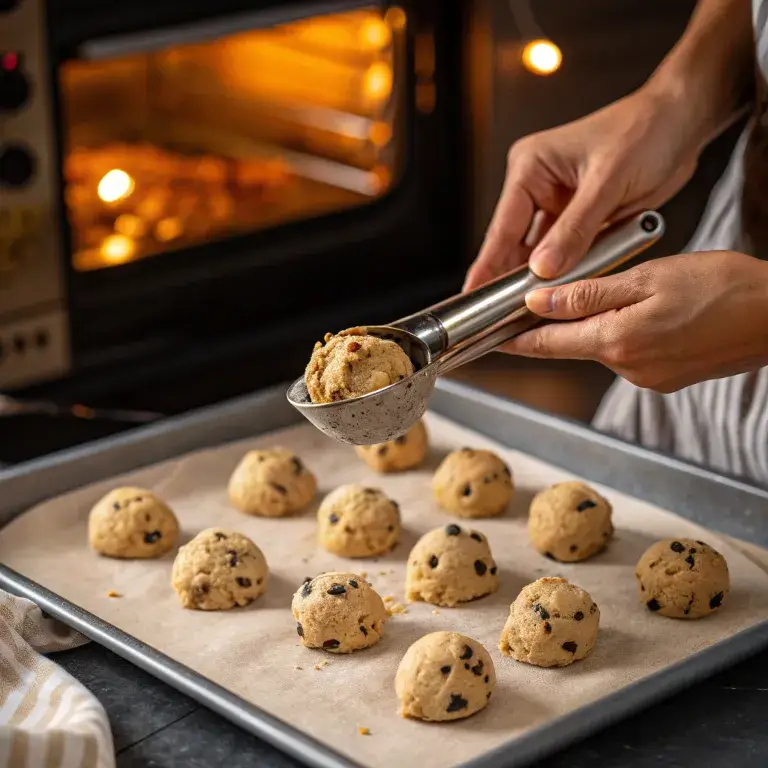
- 9. Scoop dough into 2-tablespoon portions and place onto prepared sheets.
- 10. Bake for 10–12 minutes, until edges are golden and centers are still soft.
- 11. Sprinkle with flaky sea salt immediately after baking. Cool on the sheet for 5 minutes before transferring to a wire rack.
Notes
- Chilling the dough enhances flavor and helps prevent spreading.
- Use a mix of chopped chocolate bars and chips for gooey pockets of chocolate.
- These cookies freeze well — freeze dough balls and bake straight from the freezer, adding 1–2 minutes to bake time.
- Prep Time: 20 minutes
- Cook Time: 12 minutes
- Category: Dessert
- Method: Baking
- Cuisine: American
Nutrition
- Serving Size: 1 cookie
- Calories: 190
- Sugar: 15g
- Sodium: 120mg
- Fat: 9g
- Saturated Fat: 5g
- Unsaturated Fat: 3g
- Trans Fat: 0g
- Carbohydrates: 26g
- Fiber: 1g
- Protein: 2g
- Cholesterol: 30mg
Keywords: brown butter, chocolate chip cookies, bakery style, chewy cookies
How to Make Brown Butter Chocolate Chip Cookies
The key step is browning the butter, which gives the cookies their signature taste. After that, the dough comes together like a classic cookie recipe.
Ingredients:
- 1 cup unsalted butter
- 1 cup brown sugar
- 1/2 cup granulated sugar
- 2 large eggs
- 2 teaspoons vanilla extract
- 2 1/4 cups all-purpose flour
- 1 teaspoon baking soda
- 1/2 teaspoon baking powder
- 1/2 teaspoon salt
- 2 cups chocolate chips or chunks
Browned Butter Chocolate Chip Cookies – Step-by-Step Explanation
1. In a saucepan, melt butter over medium heat. Cook until it turns golden brown with a nutty aroma. Remove from heat and cool slightly.

- Purpose:
Browning the butter (also called beurre noisette) transforms regular butter into a rich, aromatic ingredient with deep, toasty, nutty flavors that elevate the entire cookie. - How to do it:
- Use unsalted butter (typically 1 cup / 2 sticks) in a light-colored saucepan (so you can see color changes).
- Melt over medium heat, stirring frequently.
- After melting, it will foam, then the foam will subside. Watch closely as the butter turns from pale yellow to golden amber and small milk solids at the bottom turn light brown.
- You’ll smell a toasty, nutty fragrance this is the key indicator it’s ready.
- Immediately remove from heat to prevent burning.
- Cool slightly:
- Let it cool for 5–10 minutes. This prevents the hot butter from cooking the eggs when added and helps control dough temperature.
Tip: Browning butter concentrates flavor and removes water, which can lead to a chewier, richer cookie.
2. In a bowl, whisk browned butter with brown sugar and granulated sugar until smooth.
- Purpose:
This starts the wet ingredient mixture and begins to build structure and texture. - Why both sugars?
- Brown sugar (packed): Adds moisture and chewiness due to molasses.
- Granulated sugar: Helps the cookies spread slightly and adds crispness to the edges.
- Mixing:
- Whisk until the mixture is smooth and well-blended. It may look gritty at first, but continued whisking helps dissolve sugar slightly into the butter.
- The browned butter should be liquid but not hot.
Note: No stand mixer needed; this can be done by hand with a whisk or spatula.
3. Add eggs and vanilla. Mix until combined.
- Eggs act as a binder and add moisture and structure.
- Use large eggs, one at a time, mixing well after each.
- The mixture should become lighter in color and slightly creamy.
- Vanilla extract enhances flavor and complements the nutty butter.
- Mix just until combined overmixing at this stage isn’t harmful yet, but gentle mixing preserves texture.
Tip: Cold eggs can cause the butter to seize. If possible, use room-temperature eggs.
4. In another bowl, whisk flour, baking soda, baking powder, and salt.
- Dry ingredients are mixed separately to ensure even distribution.
- Flour (usually all-purpose): Provides structure. Measured correctly (spoon & level, not scooped).
- Baking soda: Reacts with acids (like brown sugar) to help cookies spread and rise.
- Baking powder: Adds extra lift for a slightly puffier texture.
- Salt: Balances sweetness and enhances all flavors.
- Whisk thoroughly to avoid clumps and ensure leaveners are evenly dispersed.
Important: Skipping this step or adding dry ingredients directly to wet mix can result in uneven rising or pockets of baking soda.
5. Gradually add dry ingredients to wet mixture. Stir until just combined.
- Gradual addition prevents overmixing and ensures smooth incorporation.
- Use a spatula or wooden spoon (not a mixer) to gently fold the dry mix into the wet.
- “Just combined” means no dry flour streaks remain, do not overmix. Overmixing develops gluten, leading to tough, dense cookies.
Golden rule: Mix until you see no more flour. A few small lumps are okay.
6. Fold in chocolate chips.
- Use semi-sweet, dark, or milk chocolate chips (or chopped chocolate bars for melty pockets).
- “Fold in” means gentle mixing with a spatula to distribute evenly without deflating the batter.
- Optional: Reserve a few chips to press on top after scooping for bakery-style presentation.
Pro tip: Toss chocolate chips in 1 tsp flour before adding to prevent sinking.
7. Cover dough and chill for 30 minutes.
- Why chill?
- Solidifies the butter so cookies don’t spread too thin.
- Enhances flavor as ingredients meld.
- Leads to a thicker, chewier center with crisp edges.
- How to chill:
- Cover bowl with plastic wrap or transfer to an airtight container.
- Refrigerate for at least 30 minutes (up to 72 hours for deeper flavor).
Bonus: Longer chilling (1–2 hours) = even better texture.
8. Preheat oven to 350°F (175°C). Line baking sheet with parchment paper.
- Preheating ensures consistent baking from the moment cookies go in.
- Parchment paper prevents sticking, ensures even browning, and makes cleanup easy.
- Alternatives: Silicone baking mat (not wax paper or greased pan).
Oven tip: Use an oven thermometer to verify temperature accuracy.
9. Scoop dough onto baking sheet, spacing 2 inches apart.
- Use a cookie scoop (1.5–2 tbsp size) for uniform cookies that bake evenly.
- Spacing is critical:
- Cookies spread as they bake.
- Less than 2 inches apart → cookies merge into one big cluster.
- Use two trays or bake in batches.
Tip: Roll dough into balls and flatten slightly for thinner cookies, or leave domed for puffier ones.
10. Bake 10–12 minutes until edges are golden and centers are soft.
- Time & visual cues:
- 10 minutes: Softer, underdone look perfect for chewy cookies.
- 12 minutes: Firmer edges, more set centers slightly crisp.
- Golden edges = caramelization and flavor development.
- Soft centers will firm up as they cool.
- Do not wait for centers to look fully cooked they should still appear slightly underdone.

Note: Ovens vary. Rotate tray halfway for even baking.
11. Cool on the sheet for 5 minutes, then transfer to a wire rack.
- Cooling on the sheet:
- Lets cookies finish setting without breaking.
- Prevents over-spreading.
- After 5 minutes, use a spatula to transfer to a wire rack to cool completely.
- This stops residual heat from overcooking the cookies.
- Serve warm (with ice cream!) or store in an airtight container.
Best served: Warm with a glass of milk or a scoop of vanilla ice cream.
Final Tips for Success:
- Use real vanilla extract, not imitation.
- Measure flour correctly (spoon into cup, then level).
- Don’t skip chilling it makes a big difference!
- Bake in batches to avoid overcrowding.
- For extra flavor, add a pinch of flaky sea salt on top before baking.
How to Serve Brown Butter Chocolate Chip Cookies (Simple Guide)
1. Serve Warm
Reheat cookies for 10 seconds in the microwave or 3–5 minutes in a 300°F oven. Warm cookies have the best texture and aroma.
2. Pair With
- A cold glass of milk (classic!)
- Coffee, hot chocolate, or chai tea
- Vanilla ice cream for à la mode or cookie sandwiches
3. Presentation Ideas
- On a plate or wooden board
- Lightly sprinkled with flaky sea salt or powdered sugar
- With a few extra chocolate chips on the side
4. Make It Fancy (Optional)
- Turn into sandwiches with caramel or frosting
- Serve on a dessert board with fruit, cheese, and dips
5. For Gifting
Pack in a cute box or jar with a ribbon and a tag: “Warm & enjoy!”
6. Store Right
Keep in an airtight container for up to 5 days, or freeze for longer.
Simple, delicious, and perfect for any occasion. Just serve with a smile!
How to Store Brown Butter Chocolate Chip Cookies
- Store in an airtight container at room temperature for up to 5 days.
- Freeze baked cookies for up to 2 months. Reheat briefly in the oven for a fresh-baked taste.
- Freeze unbaked dough balls and bake directly from frozen, adding 1–2 minutes to baking time.
Tips to Make Brown Butter Chocolate Chip Cookies
- Watch the butter carefully while browning, as it can burn quickly.
- Chill the dough to enhance flavor and prevent spreading.
- Use a mix of chocolate chips and chunks for better texture.
- Sprinkle a little flaky sea salt on top before baking for extra flavor.
Variation
- Add chopped toasted nuts like pecans or walnuts.
- Use dark chocolate or white chocolate for a twist.
- Stir in dried fruit like cranberries for added sweetness.
Brown Butter Chocolate Chip Cookies FAQs
Do I have to chill the dough?
Yes, chilling helps develop flavor and keeps cookies from spreading too much.
Can I make these gluten-free?
Yes, use a gluten-free all-purpose flour blend in place of regular flour.
Why brown the butter?
Browning butter caramelizes the milk solids, giving the cookies a nutty, toffee-like flavor.

